Fishtank update
- September 2nd, 2012
- Write comment
I’ve done a bunch more reading on reef tanks, refugiums, DIY acrylic work, overflow boxes, etc. I suppose I should preface this with the circumstances we’re in, and go from there.
We had quite a bit of existing gear from the old tank (92gal. bowfront with builtin overflow). Refugium, protein skimmer, return pump, some tubing, a whole mess of lace rock, some water movers, and two canister filters. We also had a smaller tank that was designed to be used as a refugium for this tank. The problem was that, with the stand we made for this thing, you really need to have put that tank underneath the big tank (essentially, inside the stand) BEFORE you closed everything in. As it stands now, we would need to remove too many structural supports. I was willing to remove one, since it is actually really well built, but not two. With the one removed, I was literally like 1 freaking inch shy of being able to squeeze that tank in. No dice. That brings us back to the old refugium we were previously using for the bowfront. It fits under just fine. However, it is really too small for this tank. Yes, it’ll do for now, but in the long term, we will need to get a bigger one, or perhaps more to the point, another smaller one that I can create a junction between or something.
Ok, so that led to the idea of making my own. How hard can acrylic be to work with? Turns out, it isn’t too bad. There are some great resources out there to assist with the process. Most notably, this thread over at Reef Central. When I realized this was no minor undertaking, I also tried to see if there was anyone out there making custom sump tanks/refugiums. That led to this guy, who appears to do some really quality work. Somewhere down the road, a new sump tank, or at least something to supplement the existing one, will be in order. For the moment, we have what we have.
In the process of testing the sump, pump and skimmer, I also broke the skimmer we have. Ah well. What we have would have been undersized anyway. Another thing that has to be put off a bit due to cost. I refuse to get a crappy one this time. We’ve dealt with crappy ones too many times. The pump we have will push 1200 gph. With a 5′ (approx) head, that is probably more like 900 and one 90 degree elbow reduces by another 50-100gph. All said, that is too little flow. But again, it’ll do for now.
And that brings us to the overflow box. The bowfront had the overflow built in, so that required no additional hardware. This one is not pre-drilled, and doing that yourself is always a gamble. So we opted to just go for one of the HOS (hang on side) variety. I ended up buying an Eshopps PF-1200 Overflow Box. I think for the tank size, it is just about right. It does have two downspouts, of which I am only using at the moment. I will get into the plumbing required here shortly. The key with this type of overflow is maintaining the suction (in my head, all I can hear is Craig Ferguson harping on “the proper amount of suction”). Getting that to work correctly is pretty easy, actually. It really only took a short amount of time to get a decent balance going with the water level in the tank and overflow and the water level in the sump tank. Well, and this was take 2 on that effort. This first pointed out a few leaks that had to be resolved. $40 and some plumbing solvent/cement later, and all was well. No leaks that I can see.
Ok, some pics… taking a short break from this post to get my gallery uploader all working and automated again.
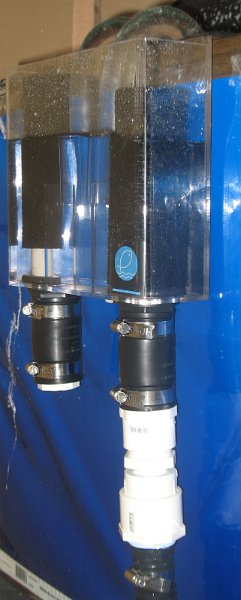
Off to the right is a picture of the overflow box hanging off the back of the aquarium:
You can see a few things here. First, I am not using the second downspout yet. Until I get a sump/refugium setup that can accept two inputs, there isn’t any point. Second, you can see how stupid the types of connectors you get with these things. Or, perhaps, my stupidity in plumbing. To get a flexible hose to the refugium of the right size, I’m using “sump pump hose” from home depot. The connectors on the overflow box are also not any standard that I can identify, so makeshift plumbing hack it is. Closer inspection of the “U” tubes that provide the suction will show that there are very nearly no air bubbles at all at the top, which is perfect. Nice even flow the whole time with no danger of it just stopping function. The picture links back to my gallery where the full size image can be found. Ok, lemme see if I can get multiple image to play nice in the layout here…
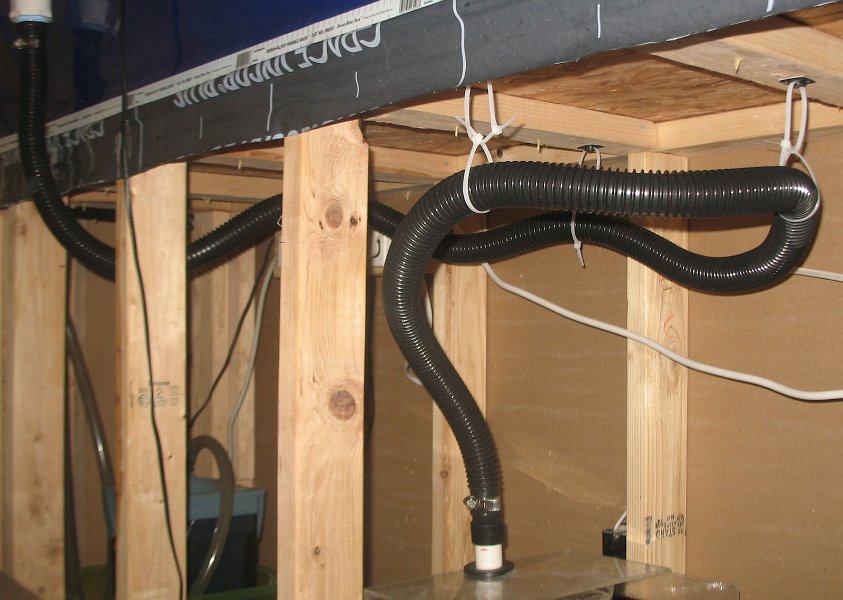
Ok, good enough. So there you see the tube I used to connect the overflow box to the refugium. Why so long, you say? Remember the aforementioned “sump pump hose”. Well, it comes in a 24 foot length, and the only place where you can put clamps on it is at 10′ intervals. So there’s obviously a bit extra there. I don’t consider this a long term solution, but it’ll work for now. It doesn’t leak, clamps on well, and thats about it. Definitely the “budget” option, here.
And so it is up and running. I haven’t tried measuring the outflow rate, but it is definitely cycling, and the water level is right at the top of the glass (when viewed from the front of the tank. The part of the overflow box that hangs inside the tank is black, and the background paper on the tank is black, so it is barely visible unless you’re really looking for it. There is already a difference in the surface particulate matter that was accumulating, so it is doing its job well. We’ll see how much water evaporation we get.
There is a LOT more work to be done here before the system can be considered to be fully operational and capable of supporting the kind of life we want it to. Next steps, as budget permits:
- Replace broken bulbs (just a couple actinics, I think)
- Get glass or plexi tank cover sized and slotted correctly
- Settle on tank layout plan, including water flow
- Supplement water flow with movers as needed
- Decide what to do with the extra canister filters (if anything)
- Replace skimmer
There will definitely be more of these posts as we make more progress. The only real limiting factor in continuing these efforts is just money. So as budget frees up, we’ll knock out some of those above items.


